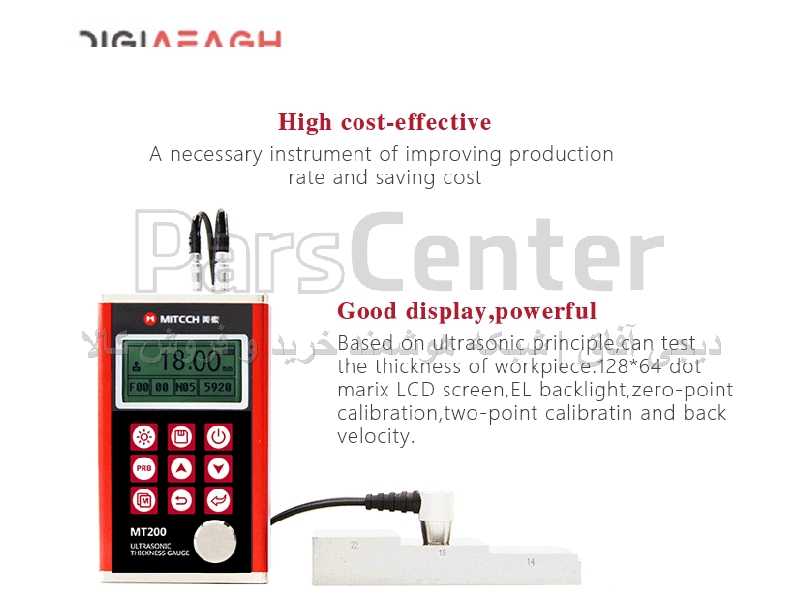
دستگاه ضخامت سنج التراسونیک MT200
دستگاه ضخامت سنج اولتراسونیک MT200: محدوده اندازه گیری: 0.75-300 میلی متر دقت رزولوشن: 0.1/0.01 میلی متر ذخیره سازی ارتباطات: USB2.0 زمان کار: 100 ساعت (نور پس زمینه EL خاموش). وزن واحد اصلی: 345 گرم ابعاد: 132*76*32mm ابعاد بسته: 31.5 * 24.5 * 8.5 سانتی متر وزن مجموع: 1.6 کیلوگرم
مشخصات
- شرکت سازنده :
- MITECH
- مدل :
- MT200
- کشور سازنده :
- چین
- دستگاه ضخامت سنج :
- اکو تو اکو
قیمت محصول
- قیمت هر دستگاه :
- از 245,000,000 تا 269,000,000 ریال
- حداقل مقدار سفارش :
- 1 دستگاه
- تاریخ به روزرسانی قیمت :
- 30 فروردین 1402
توضیحات محصول
مدل MT200 ضخامت سنج دیجیتال اولتراسونیک می باشد. بر اساس اصل اولتراسونیک، این ابزار قادر به اندازه گیری ضخامت مواد مختلف مانند فلز، پلاستیک، سرامیک، شیشه و بسیاری دیگر از هادی های اولتراسونیک خوب است. همچنین می تواند سرعت انواع مواد را اندازه گیری کند. در مقایسه با روش های اندازه گیری سنتی، مزایای ضخامت سنج اولتراسونیک برای تکمیل اندازه گیری در یک طرف قطعه کار قرار می گیرد. عملکرد تست غیر مخرب منحصر به فرد آن راه حل مناسبی را برای آزمایش ضخامت لوله های بسته، ظروف و غیره ارائه می دهد. به دلیل نظارت بر درجه نازک شدن خوردگی لوله ها و مخازن تحت فشار، به طور گسترده در نفت، مواد شیمیایی، متالورژی، کشتی سازی، هوانوردی، هوا فضا و سایر زمینه ها استفاده می شود. همچنین می توان از آن برای اندازه گیری دقیق ورق فلزی و قطعات ماشینکاری شده استفاده کرد.
Function & application
Capable of performing measurements on a wide range of material, including metals, plastic, ceramics, composites, epoxies,
glass and other ultrasonic wave well-conductive materials. Four transducer models are available for special application,
including for coarse grain material and high temperature applications.
Working Principle
The digital ultrasonic thickness gauge determines the thickness of a part or structure by accurately measuring the time required for a short ultrasonic pulse generated by a transducer to travel through the thickness of the material, reflect from the back or inside surface, and be returned to the transducer. The measured two-way transit time is divided by two to account for the down-and-back travel path, and then multiplied by the velocity of sound in the material. The result is expressed in the well-known relationship: H=v×t/2
Where:
H-Thickness of the test piece.
v-Sound Velocity in the material.
t-The measured round-trip transit time.
Working Conditions
Operating Temperature: -20℃~+60℃;
Storage Temperature:-30℃~+70℃
Relative Humidity ≤90%;
The surrounding environment should avoid of vibratin, strong magentic field, corrosive medium and heavy dust.
Instrument Features
Capable of performing measurements on a wide range of material, including metals, plastic, ceramics, composites, epoxies, glass and other ultrasonic wave well-conductive materials.
Four transducer models are available for special application, including for coarse grain material and high temperature applications.
Probe-Zero function, Sound-Velocity-Calibration function
Two-Point Calibration function.
Two work modes: Single point mode and Scan mode.
Coupling status indicator showing the coupling status.
Battery information indicates the rest capacity of the battery.
Auto sleep and auto power off function to conserve battery life.
Optional software to process the memory data on the PC.
Optional thermal mini-printer to print the measured data via RS232 port.
Operating Method and Attentions
Measuring pipe and tubing.
When measuring a piece of pipe to determine the thickness of the pipe wall, orientation of the transducers is important. If the diameter of the pipe is larger than approximately 4 inches, measurements should be made with the transducer oriented so that the gap in the wearface is perpendicular (at right angle) to the long axis of the pipe. For smaller pipe diameters, two measurements should be performed, one with the wearface gap perpendicular, another with the gap parallel to the long axis of the pipe. The smaller of the two displayed values should then be taken as the thickness at that point.
Measuring hot surfaces
The velocity of sound through a substance is dependant upon its temperature. As materials heat up, the velocity of sound through them decreases. In most applications with surface temperatures less than about 100℃, no special procedures must be observed. At temperatures above this point, the change in sound velocity of the material being measured starts to have a noticeable effect upon ultrasonic measurement. At such elevated temperatures, it is recommended that the user perform a calibration procedure on a sample piece of known thickness, which is at or near the temperature of the material to be measured. This will allow the gauge to correctly calculate the velocity of sound through the hot material.
When performing measurements on hot surfaces, it may also be necessary to use a specially constructed high-temperature transducer. These transducers are built using materials which can withstand high temperatures. Even so, it is recommended that the probe be left in contact with the surface for as short a time as needed to acquire a stable measurement. While the transducer is in contact with a hot surface, it will begin to heat up, and through thermal expansion and other effects, may begin to adversely affect the accuracy of measurements.
Measuring laminated materials.
Laminated materials are unique in that their density (and therefore sound-velocity) may vary considerably from one piece to another. Some laminated materials may even exhibit noticeable changes in sound-velocity across a single surface. The only way to reliably measure such materials is by performing a calibration procedure on a sample piece of known thickness. Ideally, this sample material should be a part of the same piece being measured, or at least from the same lamination batch. By calibrating to each test piece individually, the effects of variation of sound-velocity will be minimized.
An additional important consideration when measuring laminates, is that any included air gaps or pockets will cause an early reflection of the ultrasound beam. This effect will be noticed as a sudden decrease in thickness in an otherwise regular surface. While this may impede accurate measurement of total material thickness, it does provide the user with positive indication of air gaps in the laminate.
Suitability of materials
Ultrasonic thickness measurements rely on passing a sound wave through the material being measured. Not all materials are good at transmitting sound. Ultrasonic thickness measurement is practical in a wide variety of materials including metals, plastics, and glass. Materials that are difficult include some cast materials, concrete, wood, fiberglass, and some rubber.
Couplants
All ultrasonic applications require some medium to couple the sound from the transducer to the test piece. Typically a high viscosity liquid is used as the medium. The sound used in ultrasonic thickness measurement does not travel through air efficiently.
A wide variety of couplant materials may be used in ultrasonic gauging. Propylene glycol is suitable for most applications. In difficult applications where maximum transfer of sound energy is required, glycerin is recommended. However, on some metals glycerin can promote corrosion by means of water absorption and thus may be undesirable. Other suitable couplants for measurements at normal temperatures may include water, various oils and greases, gels, and silicone fluids. Measurements at elevated temperatures will require specially formulated high temperature couplants.
Inherent in ultrasonic thickness measurement is the possibility that the instrument will use the second rather than the first echo from the back surface of the material being measured while in standard pulse-echo mode. This may result in a thickness reading that is TWICE what it should be. The Responsibility for proper use of the instrument and recognition of these types of phenomenon rests solely with the user of the instrument.


